[ad_1]
Storage in hard disk and solid state form may be more affordable these days, but that doesn’t mean it’s unlimited. With games now taking up hundreds of gigabytes, and Windows updates needing significantly more space than they used to, you may find your drive filling up more often. Fortunately, we have a few quick tricks to help you clear clutter for whatever you need.
The Simple Stuff
The most obvious tip dates back to the Windows 95 days. Evidently, emptying your recycle bin is one of the quickest ways to free up space. If you like to live dangerously, you can go to your Recycle Bin properties and enable the option to remove files immediately whenever they’re deleted, but we don’t recommend it.
Either way, we just mention this because if you like to keep your desktop clean of any icons (see here how you can relocate the Recycle Bin), it may be weeks since you last emptied it. Also, Windows 10’s Storage Sense feature defaults to empty the bin after 30 days.
Uninstall unnecessary apps and bloatware
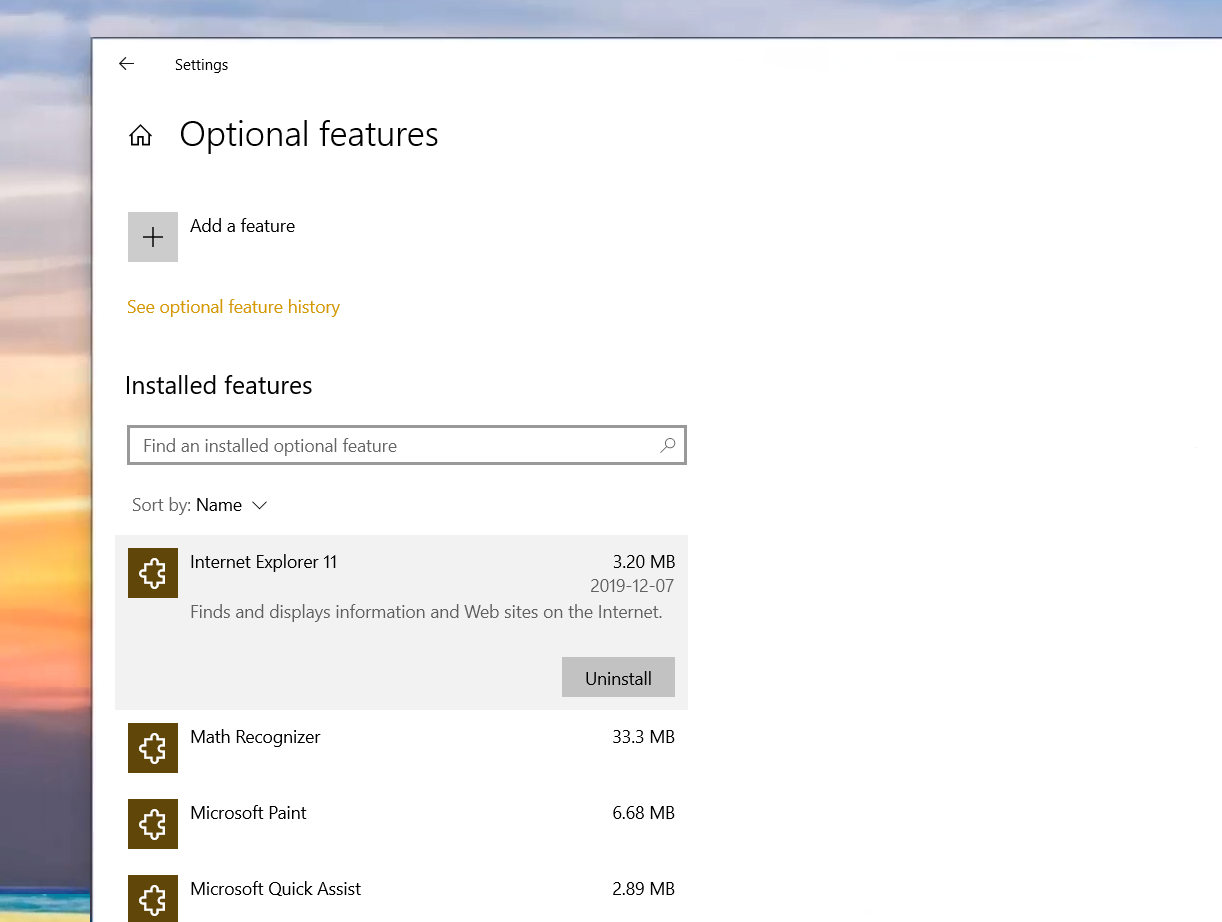
This also may seem like a simple idea, but Windows comes with a bunch of applications and features that may be useless to you. Go into the App Settings window, and you’ll be able to remove applications quickly through the menu there. Apps like Mixed Reality can be uninstalled from this menu, but if you want to remove other unused features click Optional features, and you can get rid of items like Windows Media Player or Internet Explorer 11.
Third party tools like Revo Uninstaller can help in this task, and make it a 3-click affair. These tools can also delete any leftover files after using Window’s solutions ensuring that everything is cleaned up.
Temporary Files
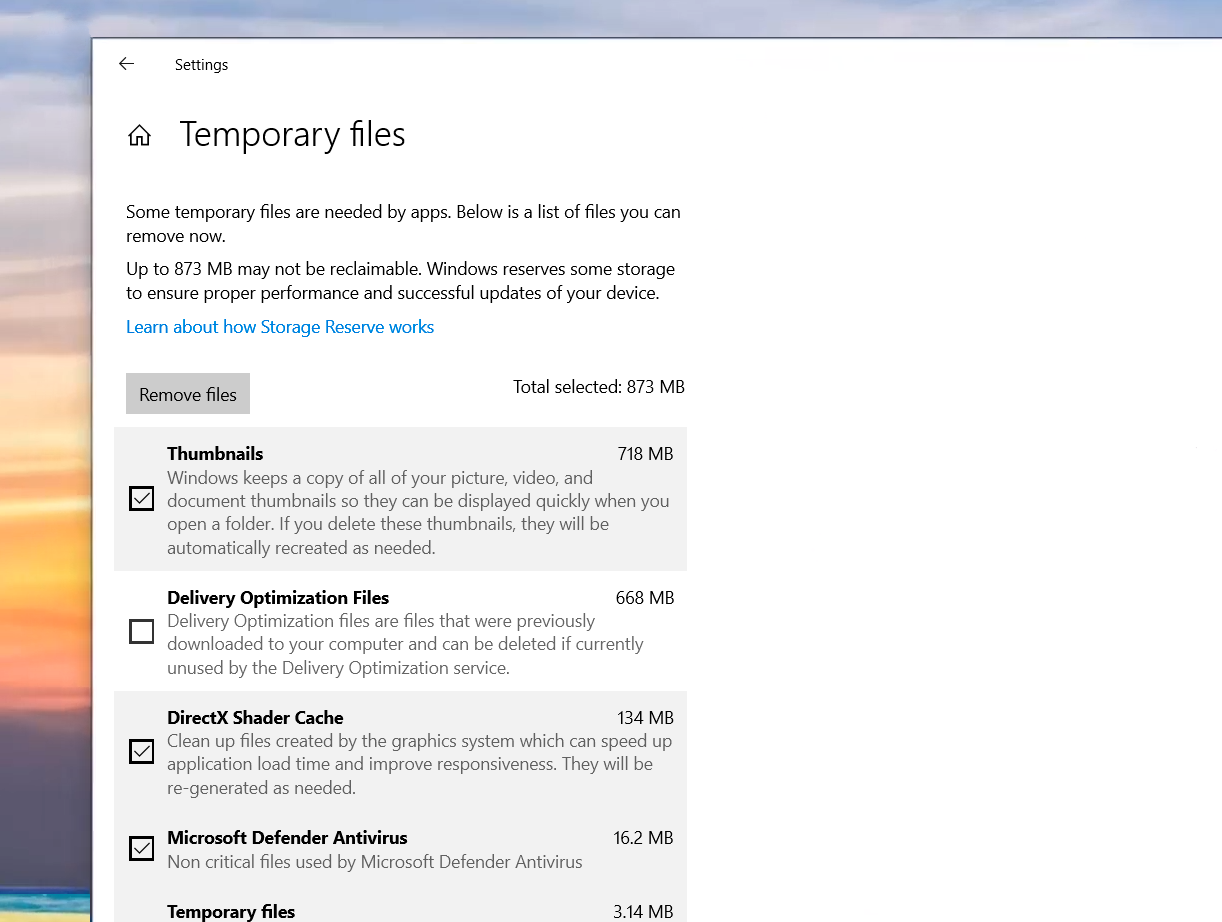
Going to Settings > System > Storage, will offer you a chance to see how much space is being taken up by Temporary files or Downloads. Clicking on Temporary Files allows you to get a more granular understanding of the storage usage, and you can select the checkboxes, that apply when you press the “Remove files” button.
Disk Cleanup
One extra way to take control of your space is to use Windows built-in Disk Cleanup utility. Disk Cleanup is part of the Windows Administrative Tools folder in your Start Menu, or you can just search for it within the menu.
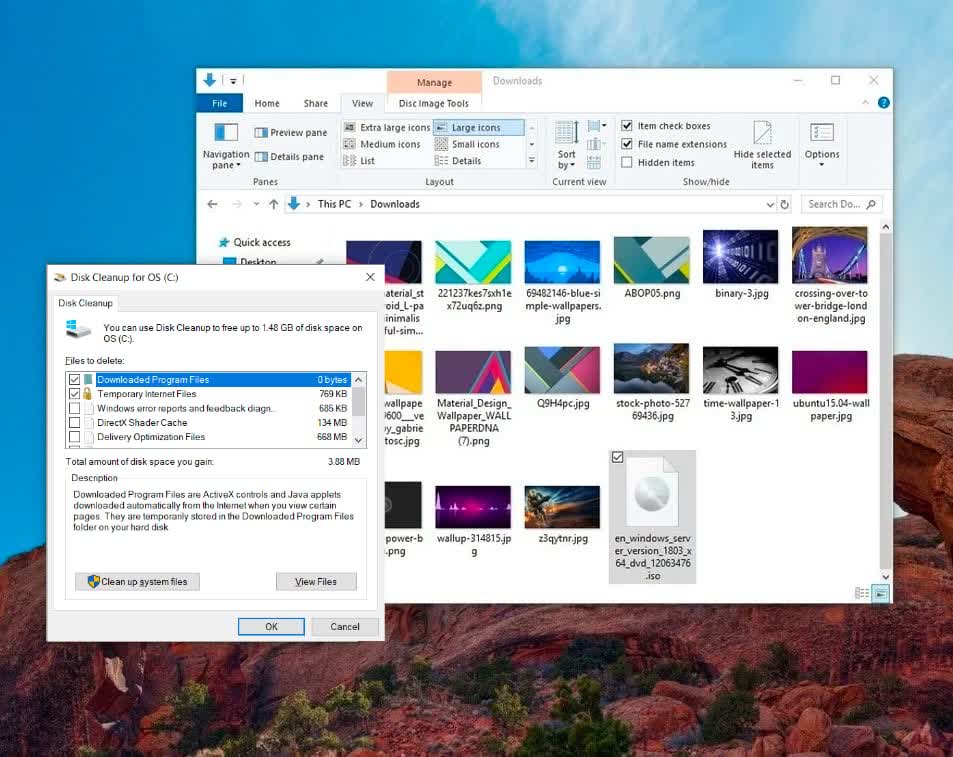
Upon launch, choose the drive to clean up and the application will show all the items you can clean up, from temporary files to thumbnails, and system files like previous Windows installations (and Windows.old folders) and files needed for updates. Select what you want to delete, and hit “OK” to finish the task.
Storage Sense
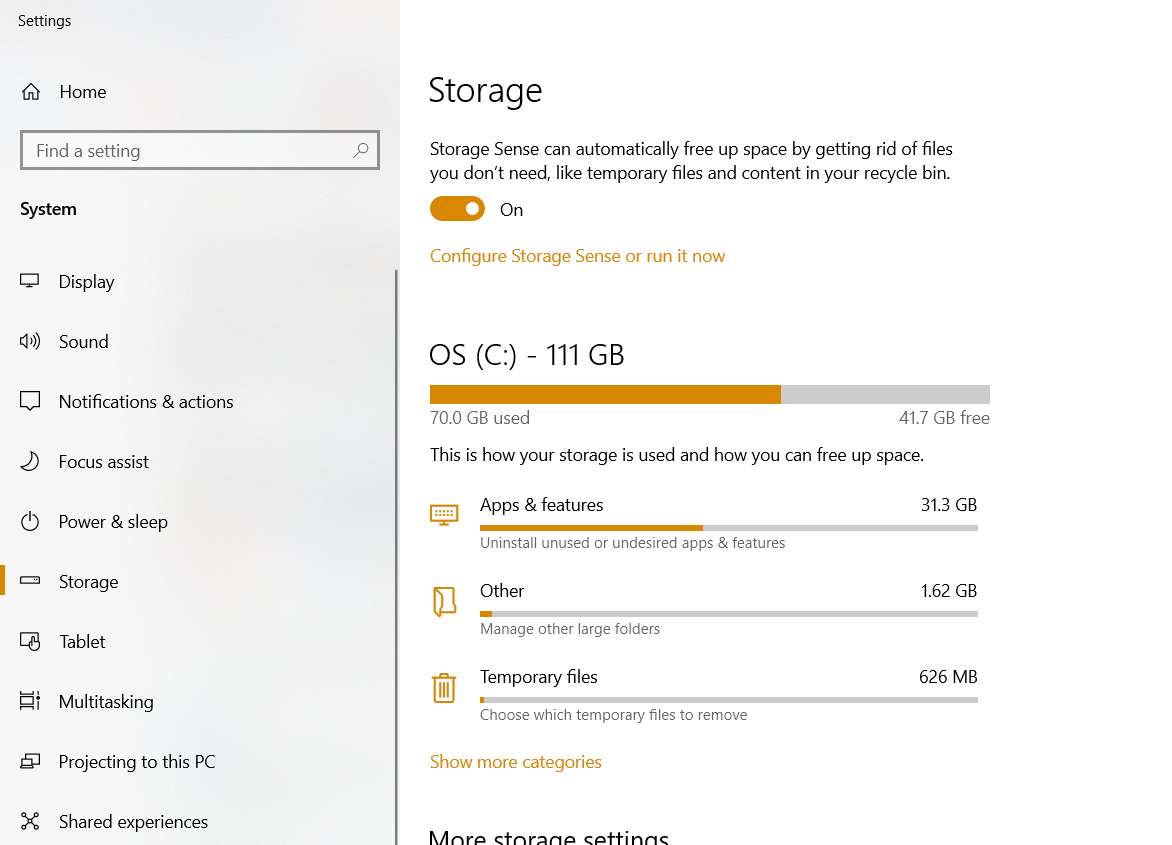
More recent versions of Windows 10 have an automated disk cleanup utility known as Storage Sense. Find it in the System Settings > Storage.
Setting up Storage Sense allows Windows to automatically delete temporary files as well as items in your downloads and Recycle Bin after a set period.
Default Save Locations
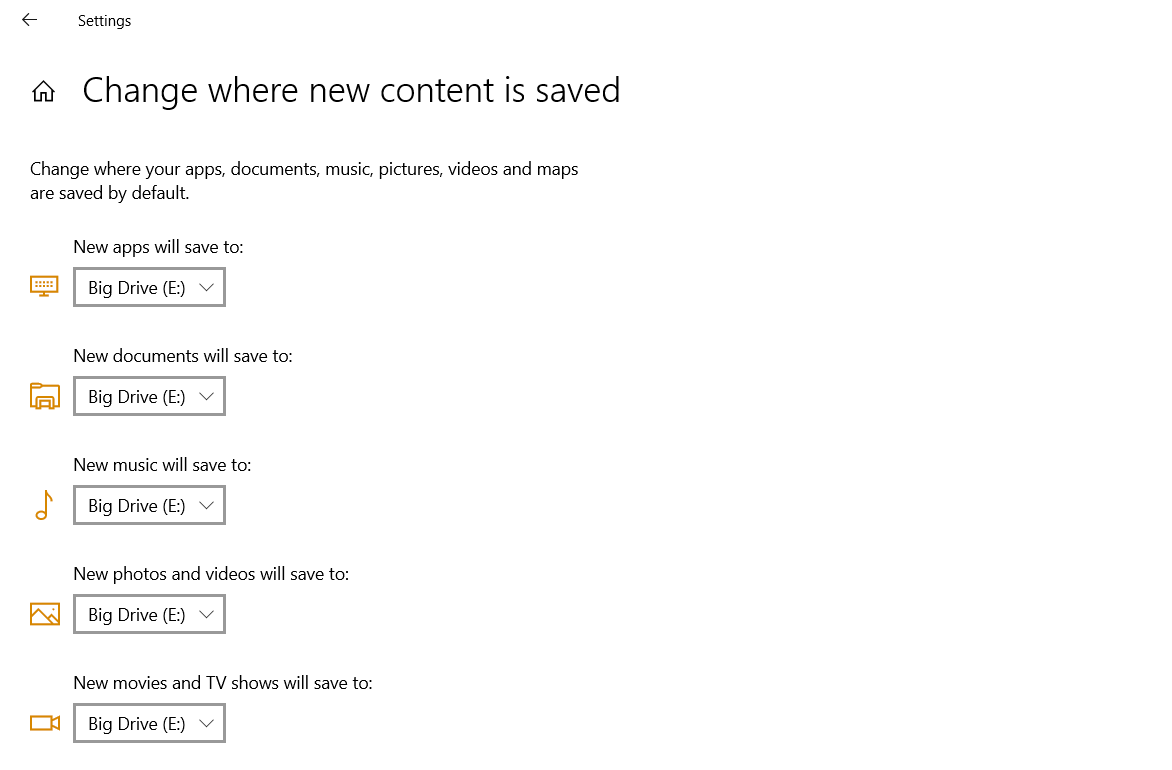
Windows sets the default save locations for documents, videos, pictures, downloads and other items to a folder on the drive Windows is installed on. Those who use a lean drive for the operating system, but other drives for games and files, will want to change this setting to free up space on the main drive.
Clicking the “Change where new content is saved” button will allow you to do that. This page will allow you to change the default save locations and even install locations for new files and apps.
OneDrive “Files On-Demand”
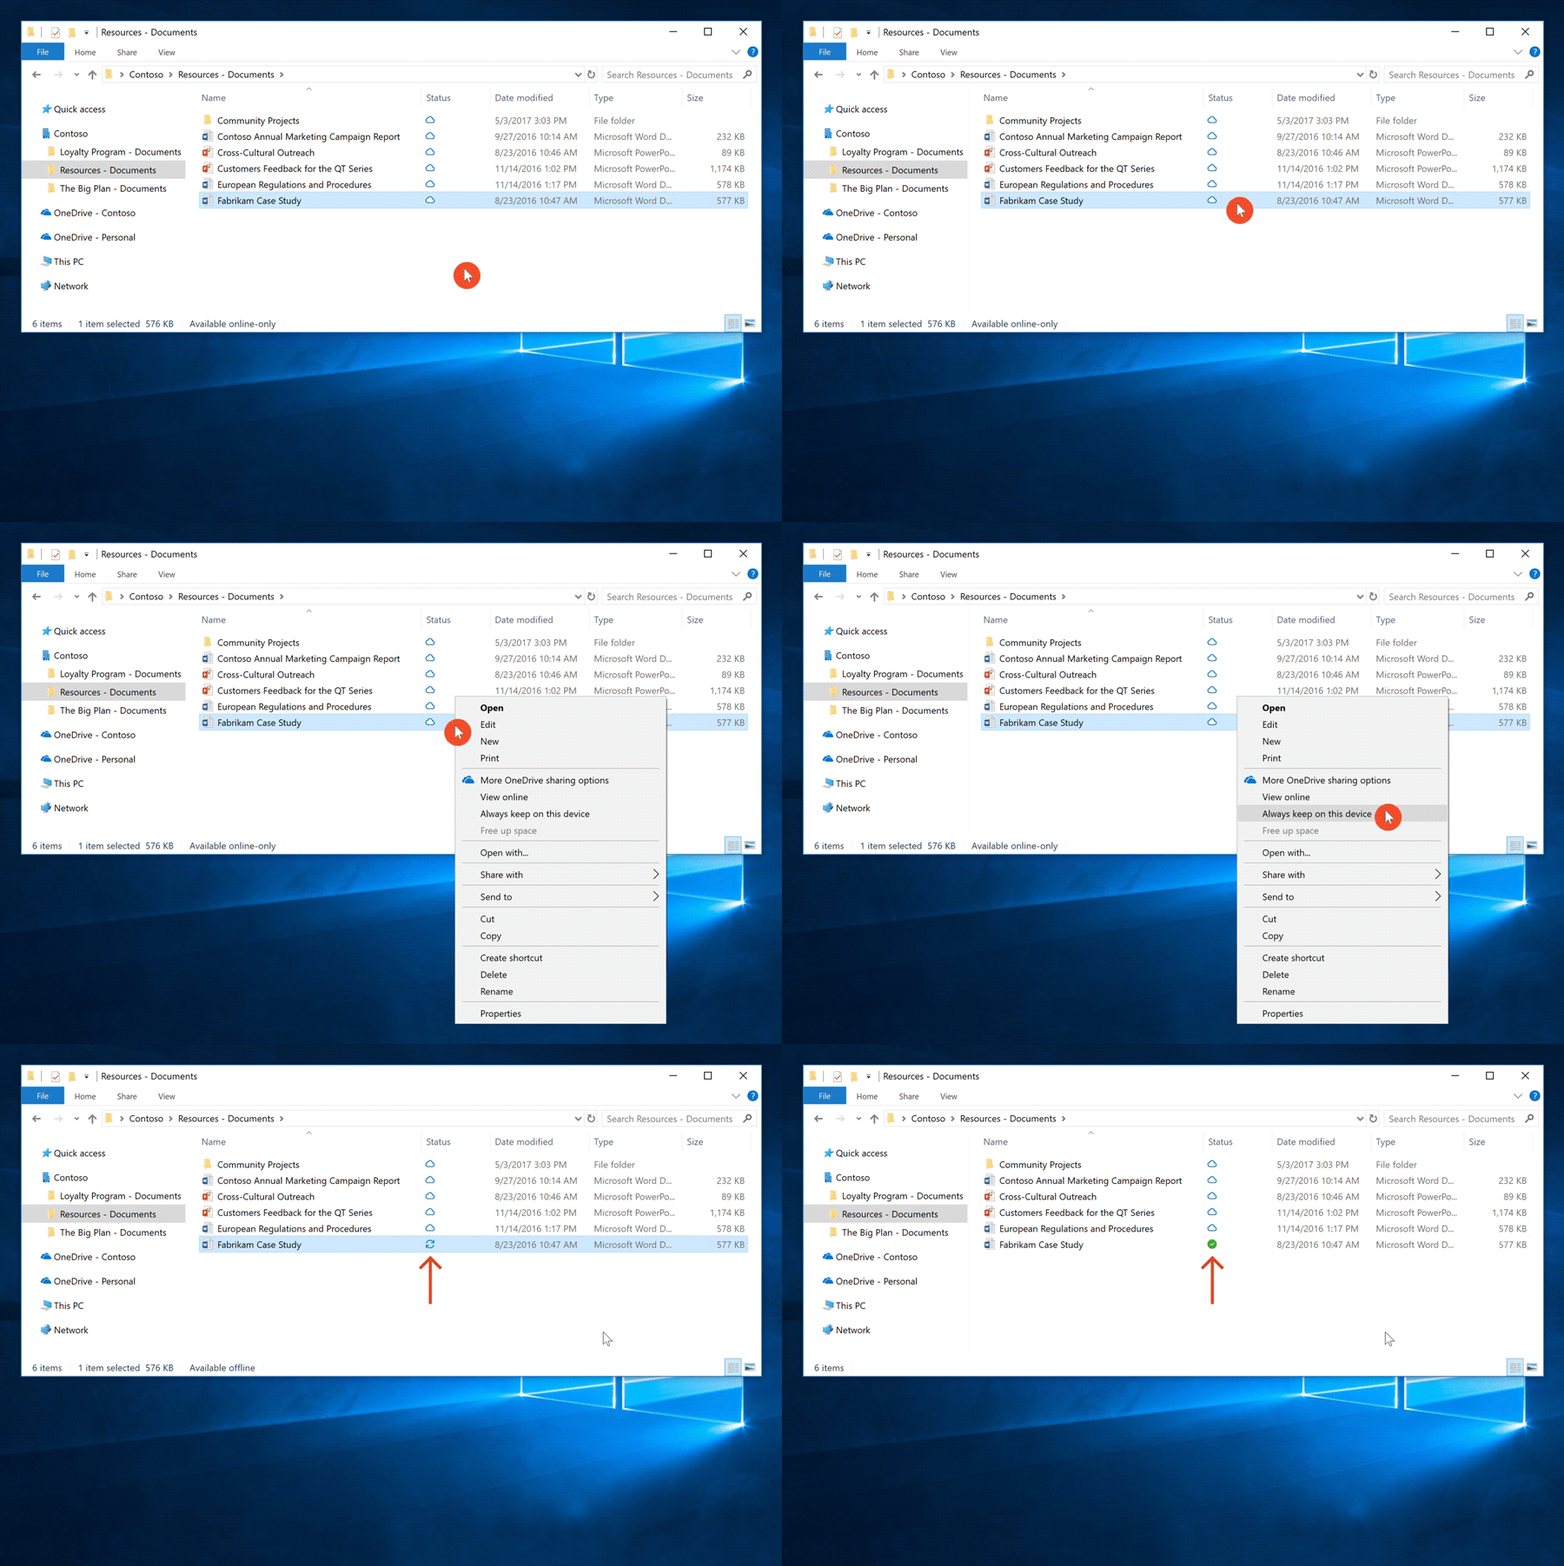
Those of you relying on OneDrive can also use a handy feature known as Files On-Demand. While the cloud drive account is handy for saving files in a centralized location, OneDrive also lets you use files in an online-only format, downloading the item when you need it, and deleting the local file when space is low.
To turn this feature on, go to your OneDrive settings, and check the box under Files On-Demand. Then when you see your OneDrive files, they will be presented in three different statuses: blue cloud files are only available online, items with a green checkmark in a white circle are locally stored files that will revert to the cloud when you run short on space, and files with a white checkmark in a green circle are locally stored, which won’t get reverted to the cloud.
Deleting Users
If you have shared your PC with someone who no longer uses the device, you can delete their account along with the files and folders associated with them. This is done through the Account Settings.
Click on the Family & Other Users item on the sidebar, then select the account that is no longer in use. From there, click the Remove button which will trigger an extra dialogue about deleting the account and data. Once you decide to delete the account, you’ll be freeing up the space used by that user on your drive.
Disable Hibernate
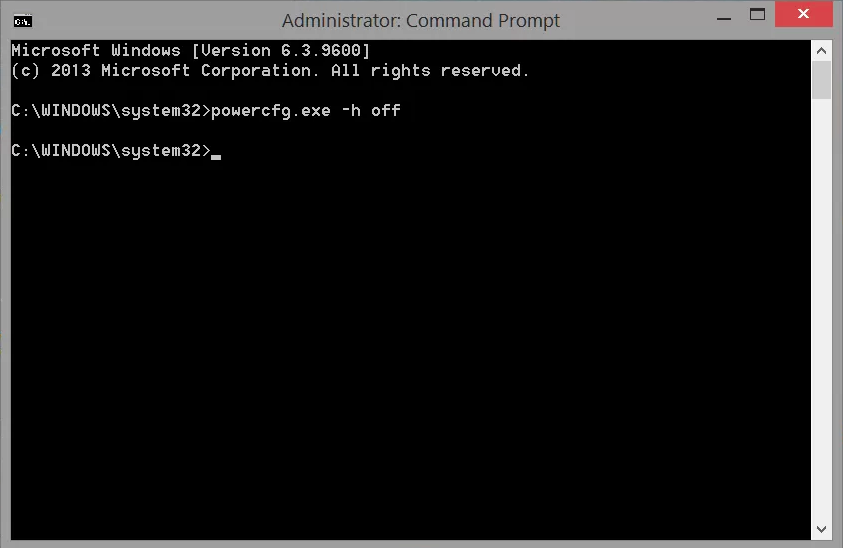
Hibernation is an energy efficient alternative to putting your computer to sleep. It writes your current system state to the drive, and allows you to turn off the PC and return to that state when you turn it back on. It also takes up several gigabytes of space. In order to disable it, open a command prompt as a administrator and type in the following:
powercfg /hibernate off
This will help save you plenty of storage, though Hibernate will be disabled. If you want to re-enable Hibernate, just open a command prompt as a administrator again and type enter the following: powercfg /hibernate on
Use the Compact OS Tool
Compact OS is a tool designed for devices with very limited storage, and can help free up plenty of space, though potentially at the cost of performance. In Microsoft’s own words, “Compact OS installs the operating system files as compressed file.”
We’d recommend performing a backup before you use the Compact OS tool and only use it on relatively fast storage. To use the tool, open up the command prompt as an administrator. Enter the following command to compress the installation of Windows 10: compact.exe /compactOS:always
This process should save you a few gigabytes of storage. If you want to reverse the change, open up a command prompt as an administrator and type in the following command: compact.exe /compactOS:never
Compress a Folder or Drive
If your drives are formatted as NTFS, you’ll be able to use the built-in compression feature to save some space. However, this option can negatively impact your computer’s performance since it’s compressing and decompressing data on the go.
You can compress a folder or a drive. To compress a folder, right click on it and select Properties. Then click the Advanced button. Then check the box next to “Compress Contents to Save Disk Space” in the Compress or Encrypt attributes section. Then click OK, and Apply. You can revert these changes by clearing the check box.
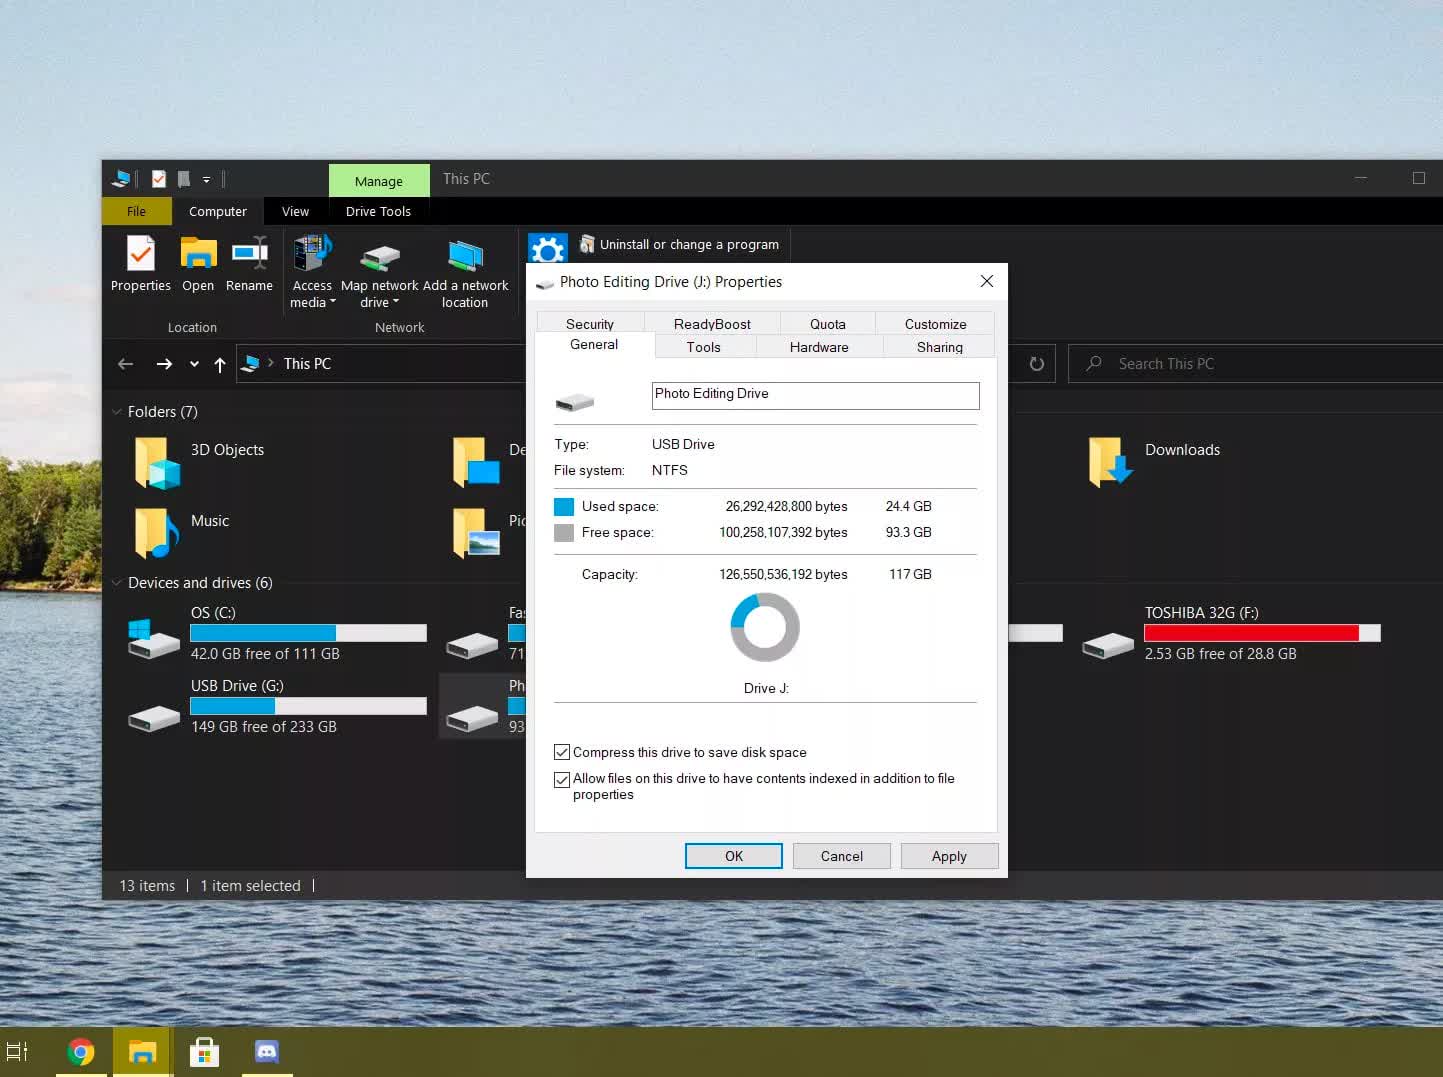
If you want to compress an entire drive, use File Explorer, and head over to “This PC.” Then you need to right click on the drive you want to compress, and select Properties. Check the box next to “Compress this drive to save disk space,” in the General Tab. Then click Apply. You’ll then be prompted with a dialogue box asking if you want to apply the change to the drive, subfolders and files. Make your selection and click OK.
Beyond Windows Tools
If these tips are too simple and aren’t getting the job done, then it will be wise to get a disk analysis tool. There are a few options like WinDirStat or Space Sniffer which analyze a drive, and provide a visualization of what folders and files are taking up the most space.
These visualizations can better demonstrate how much space an application, program or game is using, and you can find large folders or files in specific locations that are sometimes hidden or hard to find.
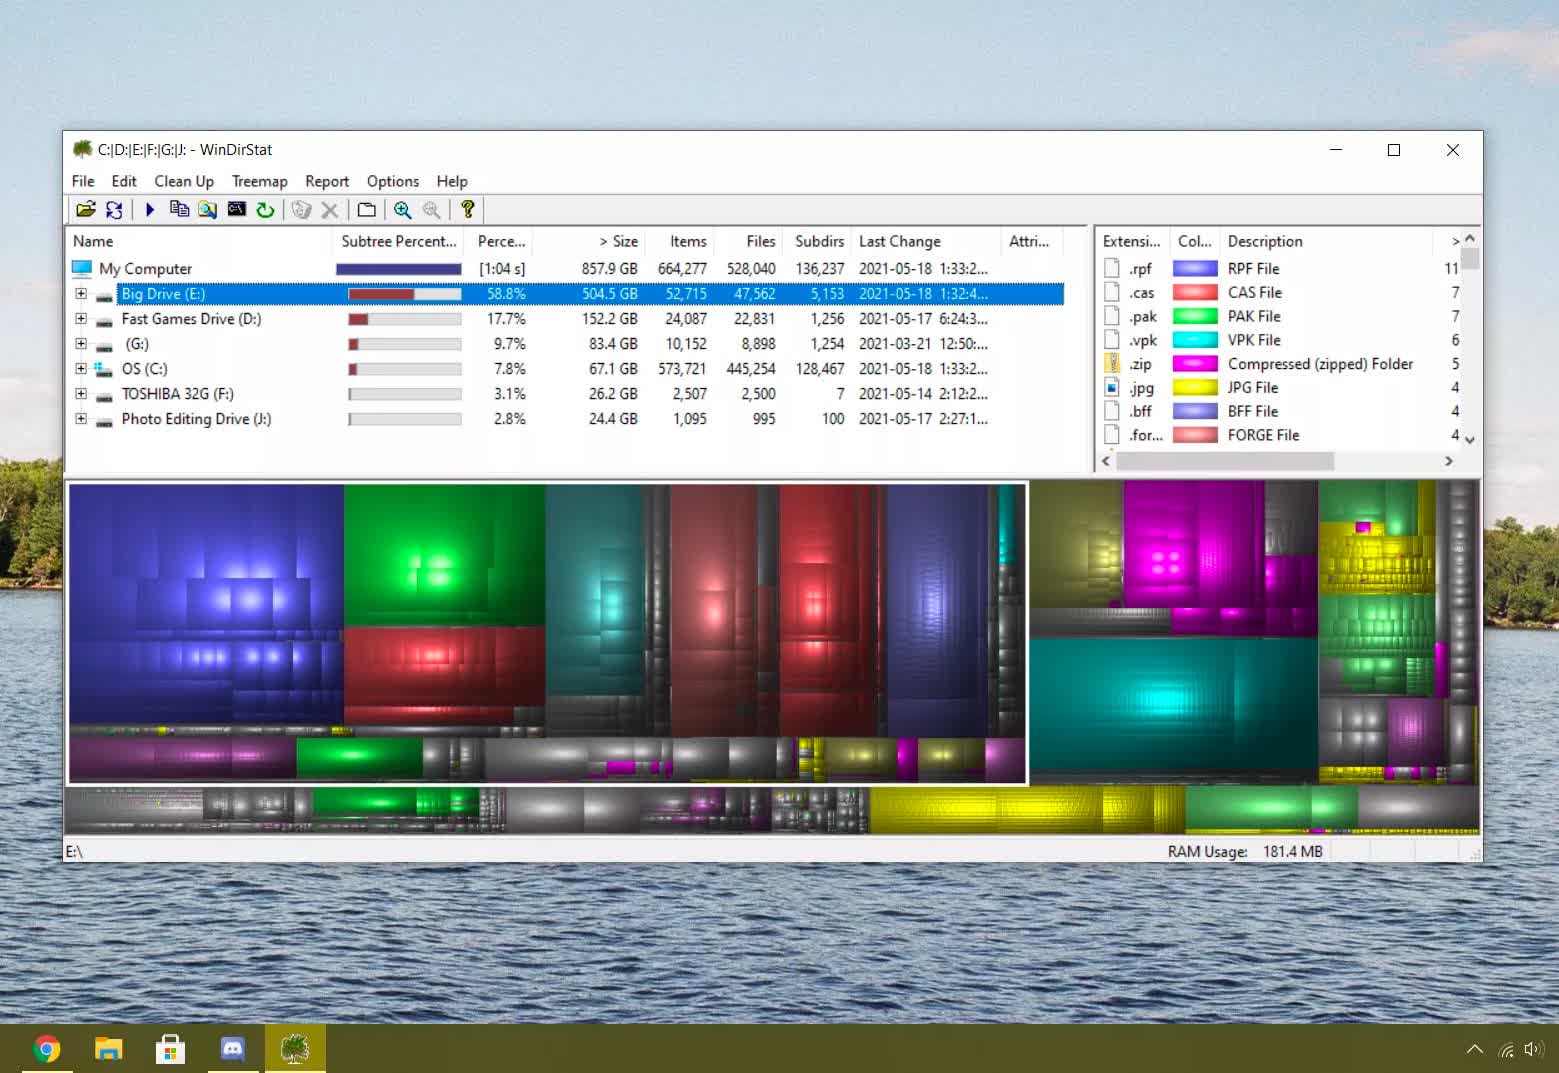
This is a great way to find and delete temporary files from specific applications, or user data that’s no longer necessary. For example, within the Windows AppData folder are caches and temporary files for browsers, messengers and game clients, which might be ripe for deletion. Other folders, can include temporary installers for AMDs or Nvidia’s driver package installers.
If you need ideas of places where you might be able to regain some storage space, here’s a few:
- Mobile backups of your phone or tablet
- Files for unused web browsers, instant messengers and game clients
- Old OS drive images and other backup files
- Emails stored locally (especially attachments)
- File conversion software with media files stored in random locations
- Cloud storage software with files stored locally that you can remove (Dropbox, Box, OneDrive, etc.)
- Tools that auto-update your drivers
- Unused virtual machines (move them to a different drive)
- Temp folders everywhere
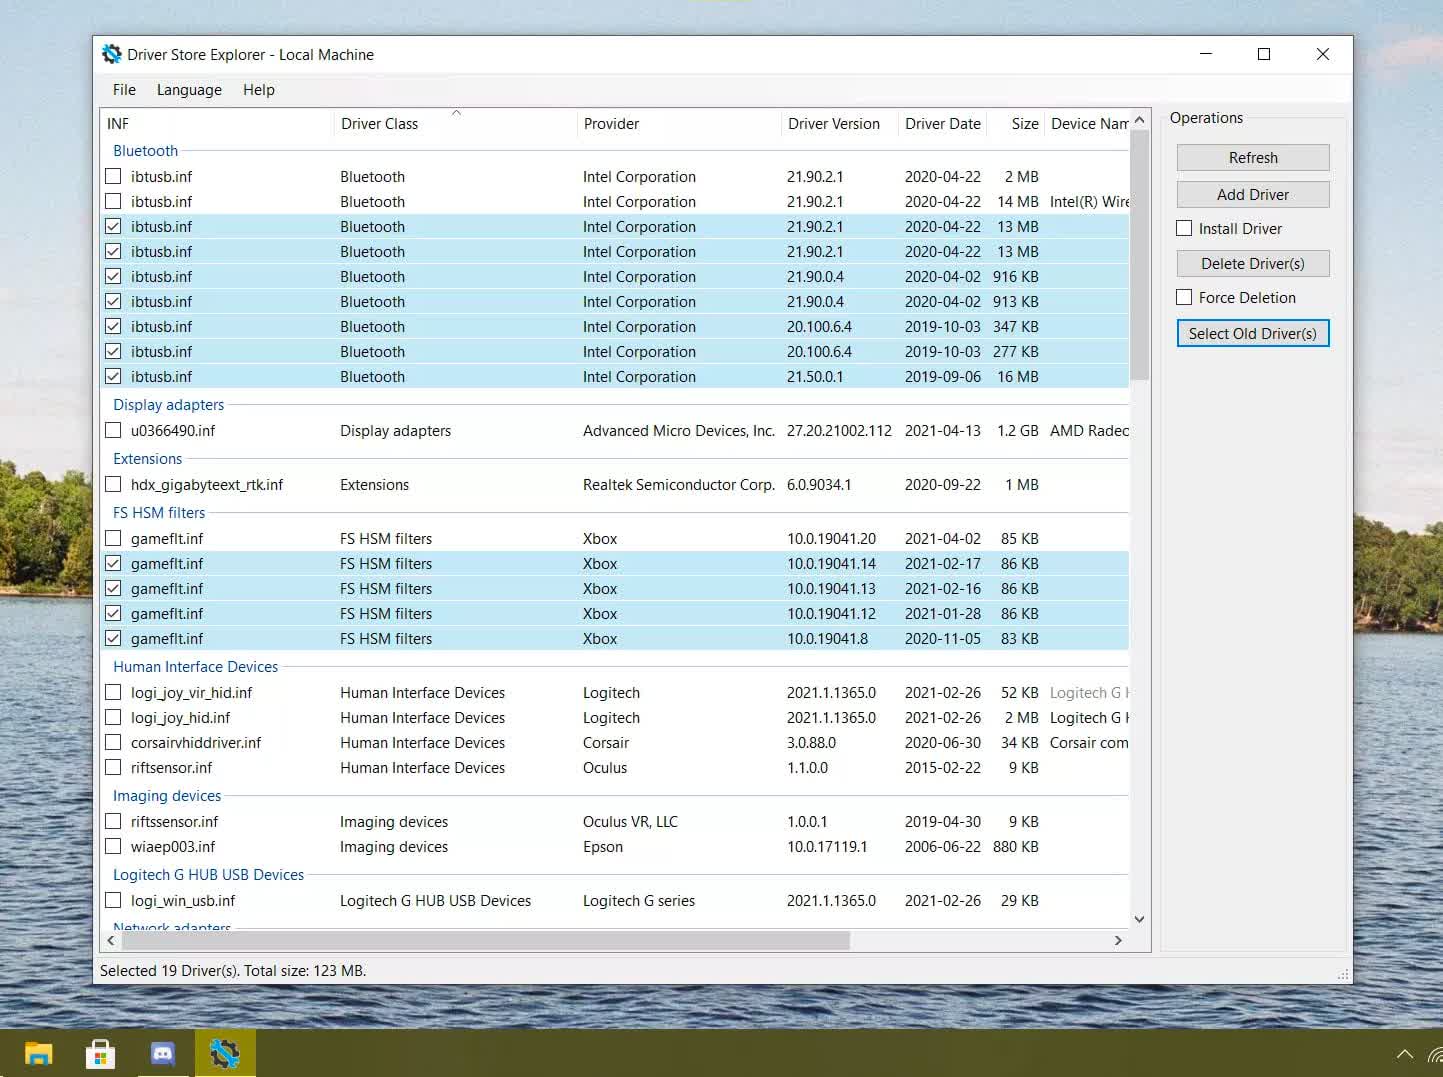
Sometimes Windows has a significant number of old and unnecessary files within its System folder. Using tools like DriverStore Explorer can help clear up cached and outdated drivers.
There is also a lot of space reserved for Windows Component Store Files (in WindowsWinSxS), used in customizing and updating Windows, and system recovery operations. If you’re desperate to clear some space, enter this in a command prompt:
dism.exe /Online /Cleanup-Image /StartComponentCleanup /ResetBase
This action will remove outdated files as well as verify and repair the latest system files. Performing this will impact your ability to roll back after an update though, but it can save significant amounts of space.
Finding and Deleting Duplicate Files
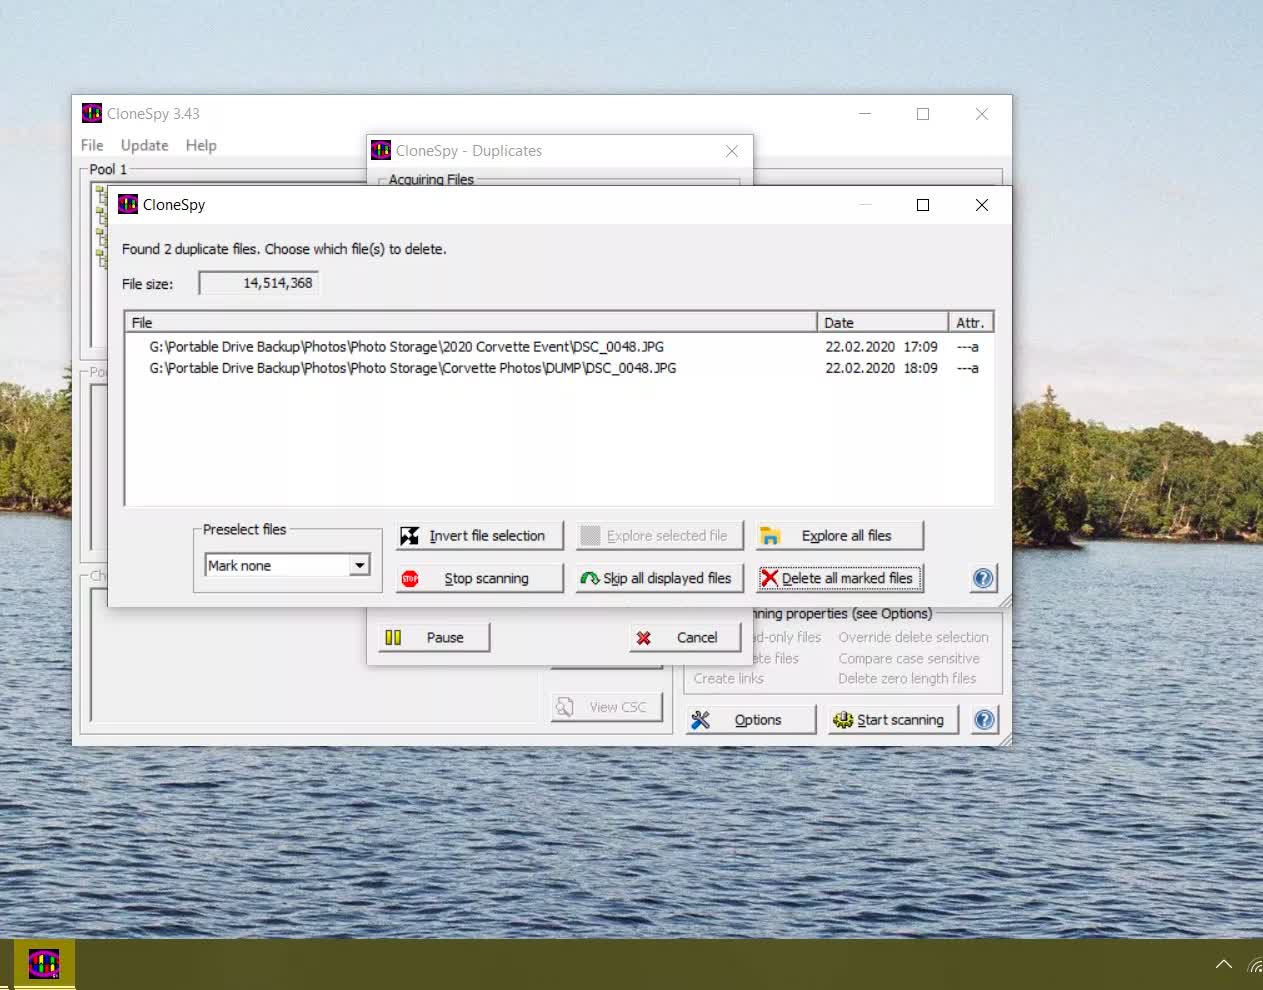
Clearing out file duplicates is a great way to free up space, but it isn’t always the easiest process. Fortunately, there are a few third-party tools that can make the job easier.
CCleaner includes a duplicate file finder tool, as does Total Commander. Some applications specialize in finding and deleting duplicate files including CloneSpy, Wise Duplicate Finder, Duplicate Cleaner and DupScout.
Last Resorts…
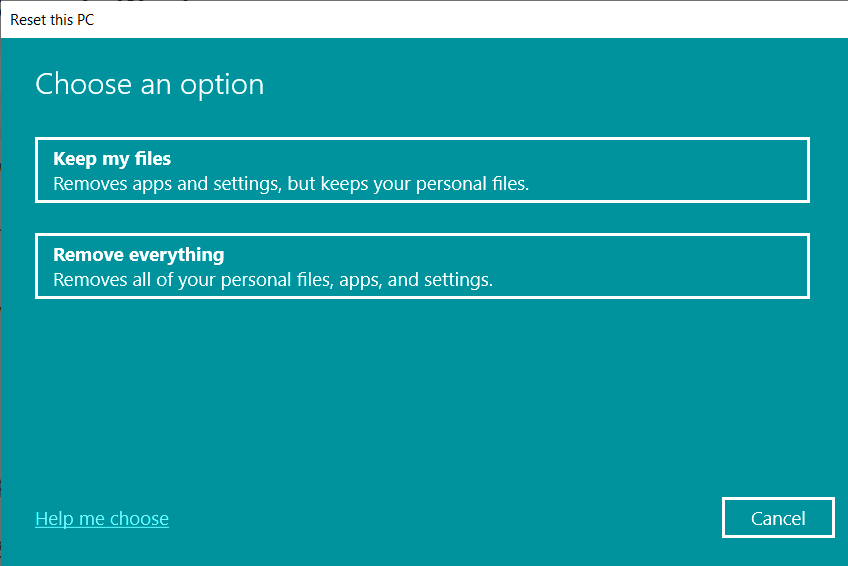
If these tips didn’t help enough to free up space, there are a couple more tricks that are best saved as last resorts. Windows has a built-in reset function, which clears everything and starts you off with a clean slate. Go to Settings > Update & Security > Recovery. The first button will initiate the Windows 10 reset.
And finally, you can always transfer files to an external drive and free up speedy internal storage for your operating system and applications, but this is always the costlier option. Though in all honesty, a 5TB drive for less than $100 does sound tempting.
More Useful Tips
[ad_2]
Source link